1962 Fairlane Transmission Tunnel Cover
by brucesharon in Workshop > 3D Printing
125 Views, 1 Favorites, 0 Comments
1962 Fairlane Transmission Tunnel Cover


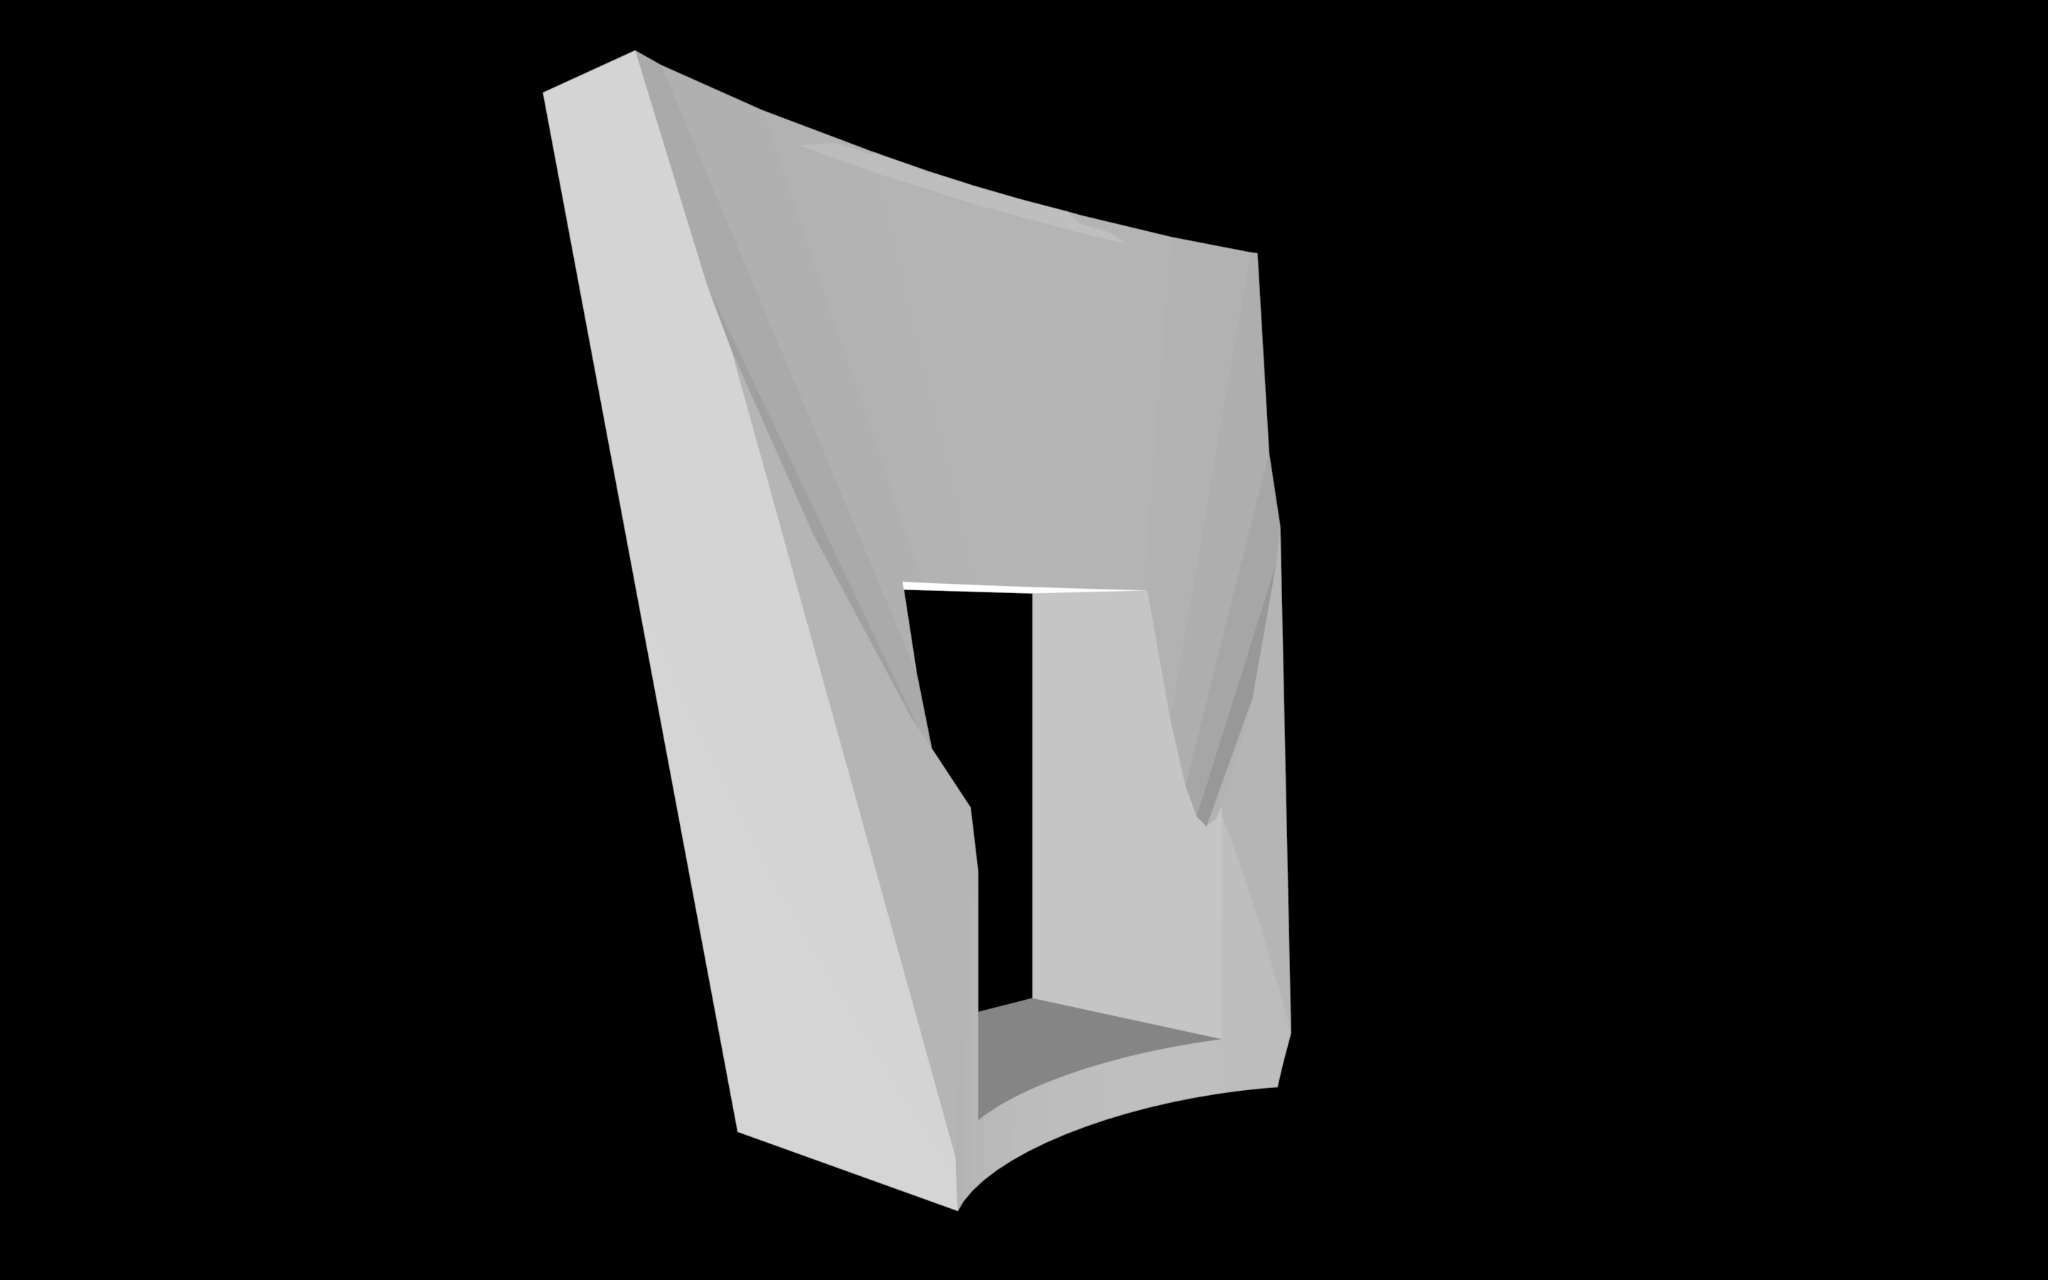
(Concept of application works, but still needs to be refined. Above picture is a rough visual of what is possible to create with an Elegoo Neptune 2 3D Printer)
Among the Fairlane Community, some of us have set out to preform a V8 swap. With this swap comes various problems including engine mounts, exhaust, interior trim, clutch pedal adaptations, generator to alternator conversion, and other various minute details that coincide with getting the car up and running.
This project aims to create an idea of how to incorporate a Tremec T-5 Transmission into the floor of the Fairlane by making the transition from the transmission housing to the interior more pleasing to the eye.
Supplies
- Any capable 3D printer
- Paper
- Measuring Tape
- Computer with any 3D modeling software
- Dremel Tool
- Temperature resistant filament
Measurements

The best way I could describe the first step is to visualize what you want the final product to look like. Some questions to ask yourself are, How tall do I want this cover to be? How wide should this cover be? What shape should this cover be? What other accommodations am I going to have to consider?
For my application I wanted my cover to be at least tall enough to cover the entirety of the transmission that protrudes into the interior. For my process I used a piece of paper(red line) and a ruler(blue rectangle) and took measurements of where the height of the cover would be. In the front of the cover(towards the firewall) I measured 1.5 inches above the surface of the floor. In the back of the cover, I measured 4 inches from the floor to where it would make a horizontal with the 1.5 inches I measured previously. I then decided how wide I would want this cover to be. From this measurement you can then measure down from the edges of the cover and find the distance from the edges to the floor of the car. These measurements give you a reference on how to make the cover follow the curvature of the transmission tunnel.
Measurements to Tinker Cad
Once all the measurements are taken, you can start to visualize how the final shape will look. With that visualization you can start designing your shape in Tinker Cad. Tinker Cad is one the easiest 3D modeling softwares available for free, that's offered to the consumer basis. There are quick videos on YouTube that are available to help you understand the basics of the software. Some recommendations when building in Tinker Cad is to remember to cut out the material that you won't see in the final project. This will save you time in the later steps.
Stl. File to 3D Printer

Once your design is complete in Tinker Cad, now you must convert that Step file to an Stl file. To do this there are free online conversion websites that make this possible, it just takes a few seconds. Once the file is converted, open up the file in your 3D modeling software and make the proper adjustments for how you would like the file to be printed. For this rough prototype I would worry less about the quality of the print.
From 3D Printer to Vehicle Fitment

Once the cover is finished printing, I would allow it 1 day to fully cure and shrink to its final size. After the day of curing, you are at the point of getting the prototype to fit right. This step might be a little messy and time consuming so be patient. The cover may or may not fit exactly right so this is where the dremel tool comes in handy. Any spot on the cover that is not allowing it to sit flush with the floor of the car can be ground down. This way you get a tight fit from the cover to the carpet so there won't be any large gaps. Once you are satisfied with the fitment, you may now go back into Tinker Cad and adjust the 3D model to remove the material in the model that you physically removed from the prototype. Once this has been completed you are now able to print the final configuration of the Cover.
Printing Final Product
One thing to consider when printing the final product is the type of filament that you are using. Since transmissions can become very hot, I would recommend that you purchase a filament spool that can withstand the maximum temperature of the transmission that you are using. This is so that when your transmission is operating at its standard temp, the cover will not warp and or melt. Another thing to consider when screwing the cover down, is the ease of removal. Having the cover be easily removable helps when you are having to do any maintenance on your vehicle.
Lastly, the size of this print took 2 days and 6 hours, so be sure to plan time out of your week for the duration of the print. Also be sure to follow the manufacture recommendations on print settings as this should allow you to have the best quality print.