14th & AR, New York City
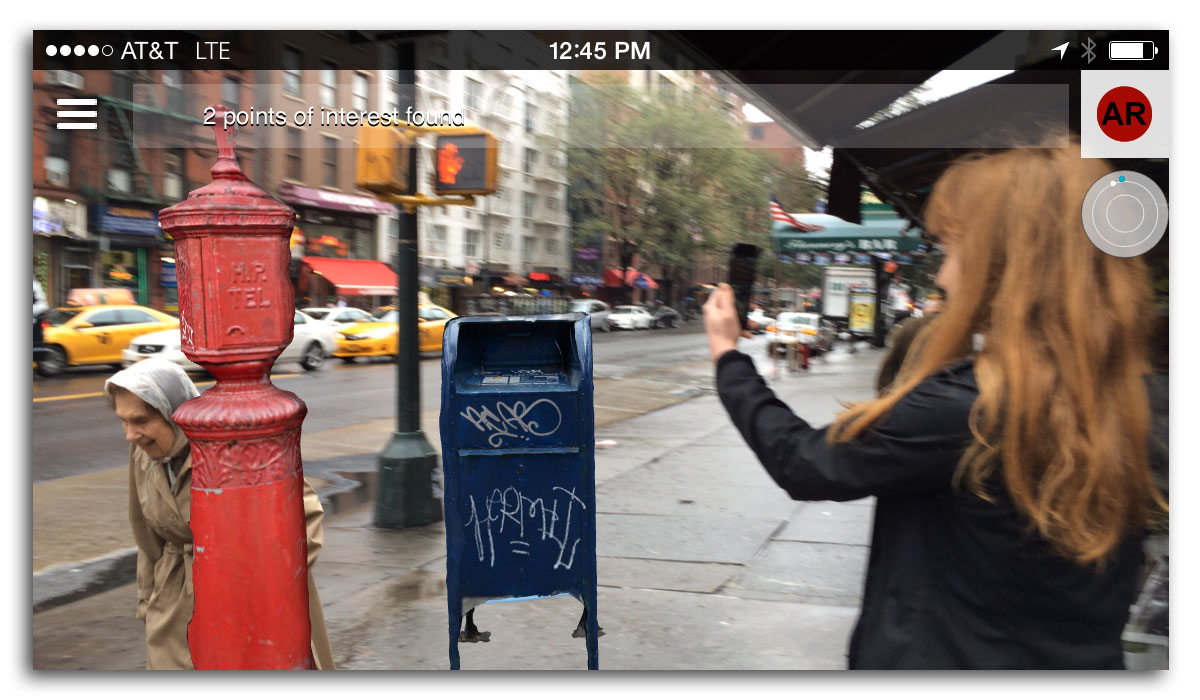
14th Street between Union, Square and 9th Avenue New York City
There are particular locations around the world where network activity has become so intense that the virtual world has begun to penetrate into the real. 14th & AR in New York City is one of the most active of these sites. Artist John Craig Freeman has developed a software application for mobile devices that allows the general public to detect and view this phenomenon.
Background
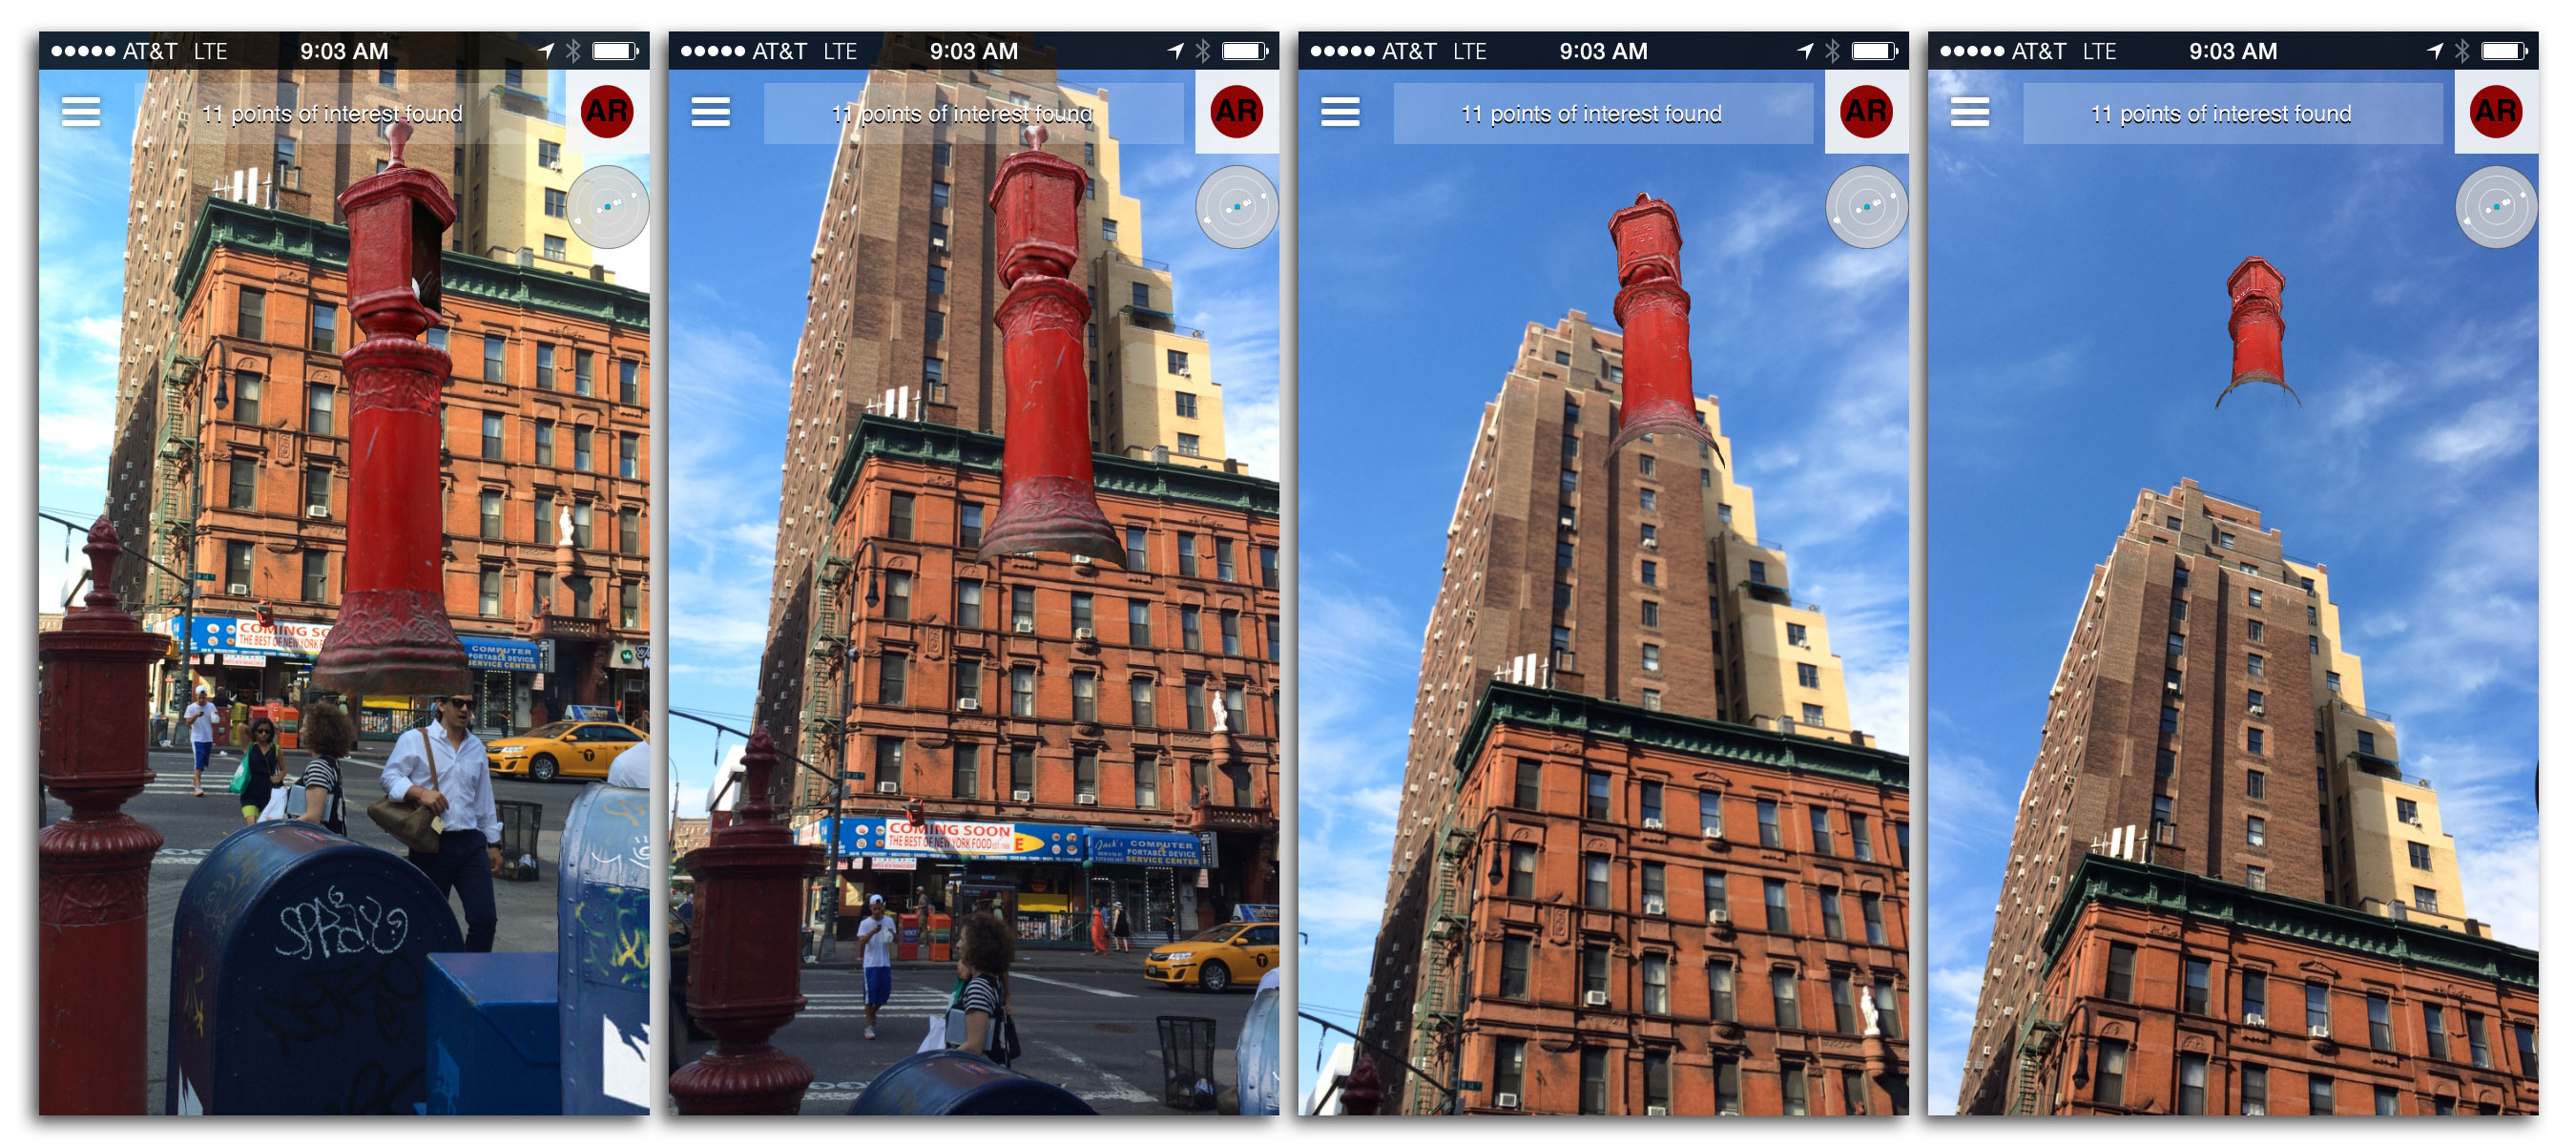
Theorist and science fiction authors have predicted for years, that the virtual world would one day begin to merge with the real. Bits and bytes will leak into and mingle freely with atoms and molecules.
Like the subterranean watershed, virtual dimensions courses through the cityscape in rivers of fiber optic flows, just below the surface, often indictable with the naked eye. 14th & AR converts the users phone into a divining rod of sorts, allowing netzens to dowse for alternative realms of awareness. Dig deep enough and virtual reality leaks into the physical world unabated, a fountainhead the hyper-real. Objects appear to replicate and float off into the sky. Entire buildings lose their mooring and drift away. Reality itself becomes unstable and fleeting at the intersection of 14th & AR.
Prepare Your Phone

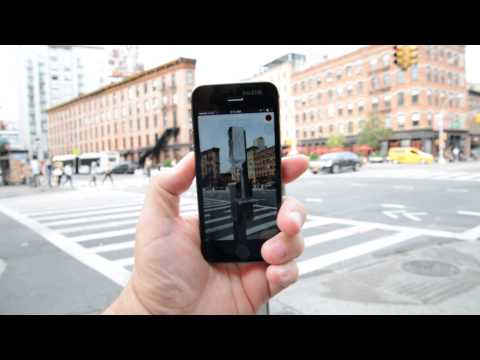
To view the work on location along 14th Street, between Union Square and 9th Avenue, in New York City, using any late model iPad, iPhone or Android, download the free Layar Augmented Reality Browser (http://layar.com) and scan this code.
View the Work on Location in New York City
Create Your Own Geo-located Augmented Reality
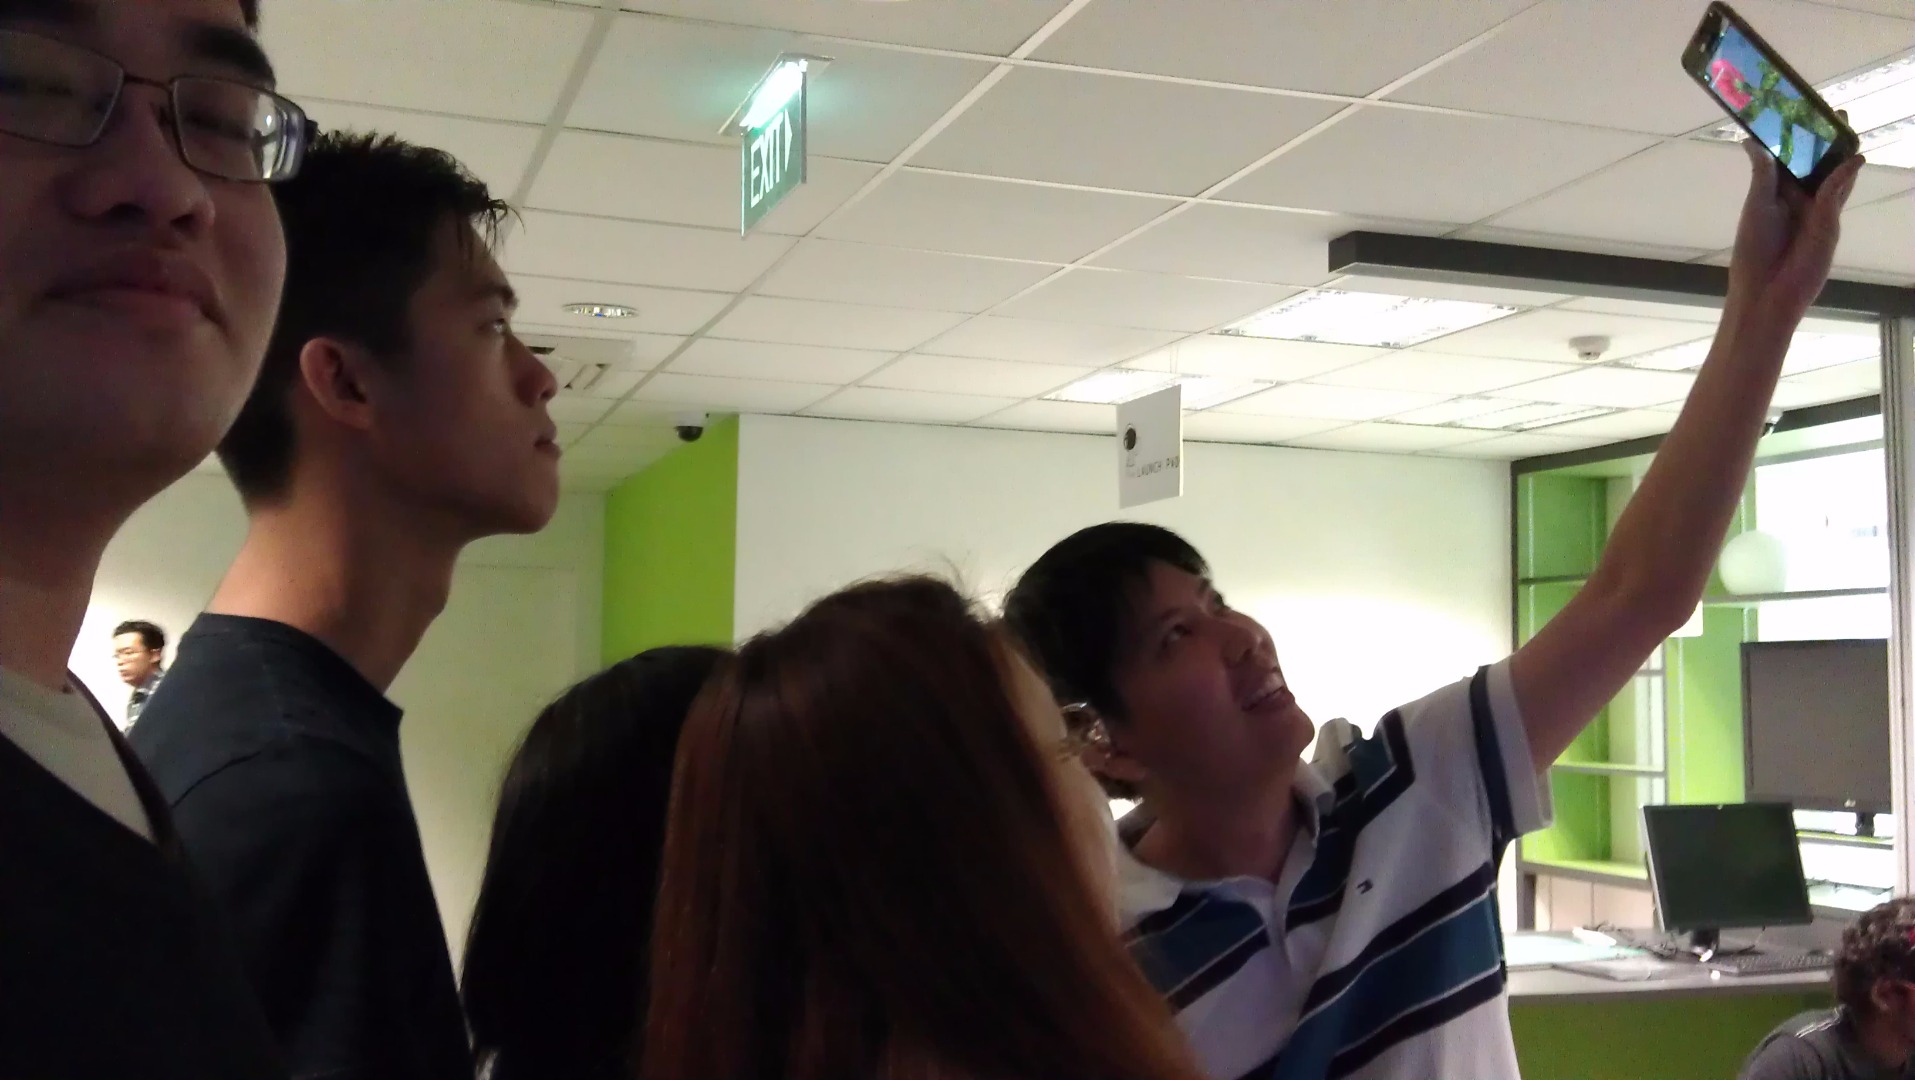
This 15–hour Instructable provides a hands-on introduction to geo-located augmented reality.
Geo-located Augmented Reality allows people to experience alternative realities at site specific locations. The public can simply download and launch a free mobile app and aim their devices’ cameras at the surrounding physical place. The application uses location detection technology to superimpose virtual objects, people or scenes at precise GPS coordinates, enabling the user to immerse themselves in the work as if they existed in the real world.
By the end of the workshop you will be able to:
• Create and manage an augmented reality assets
• Create simple but meaningful 2D and 3D virtual objects and place them at specific geographical locations
• Understand how to use the Layar Mobile Augmented Reality Platform
• Test, view and document your work on location
Participation Requirements:
• Each participant must bring a late model mobile device (iPhone, Android smartphone or iPad) equipped with a camera, GPS, compass, accelerometer, and mobile Internet or Wi–Fi connection
• Each participant must have access to a late model computer with an Internet connection
• Advanced participant must have access web servers space and a database. If no institutional support for databases is available, participant must signup for a third–party web hosting provider. I recommend GoDaddy. The host must allow unrestricted FTP (file transfer protocol) access to at least 40 MB of web servers space and a dedicated MySQL database (client version: 5.1.49 or later) running phpMyAdmin (version: 3.3.10.4 or later)
Getting Started
Keep you phone charged at all times.
Create a folder on you hard drive named Augmented_Reality Download the Workshop Assets to your Augmented_Reality folder Open Workshop_Assets/AR_Admin.rtf.
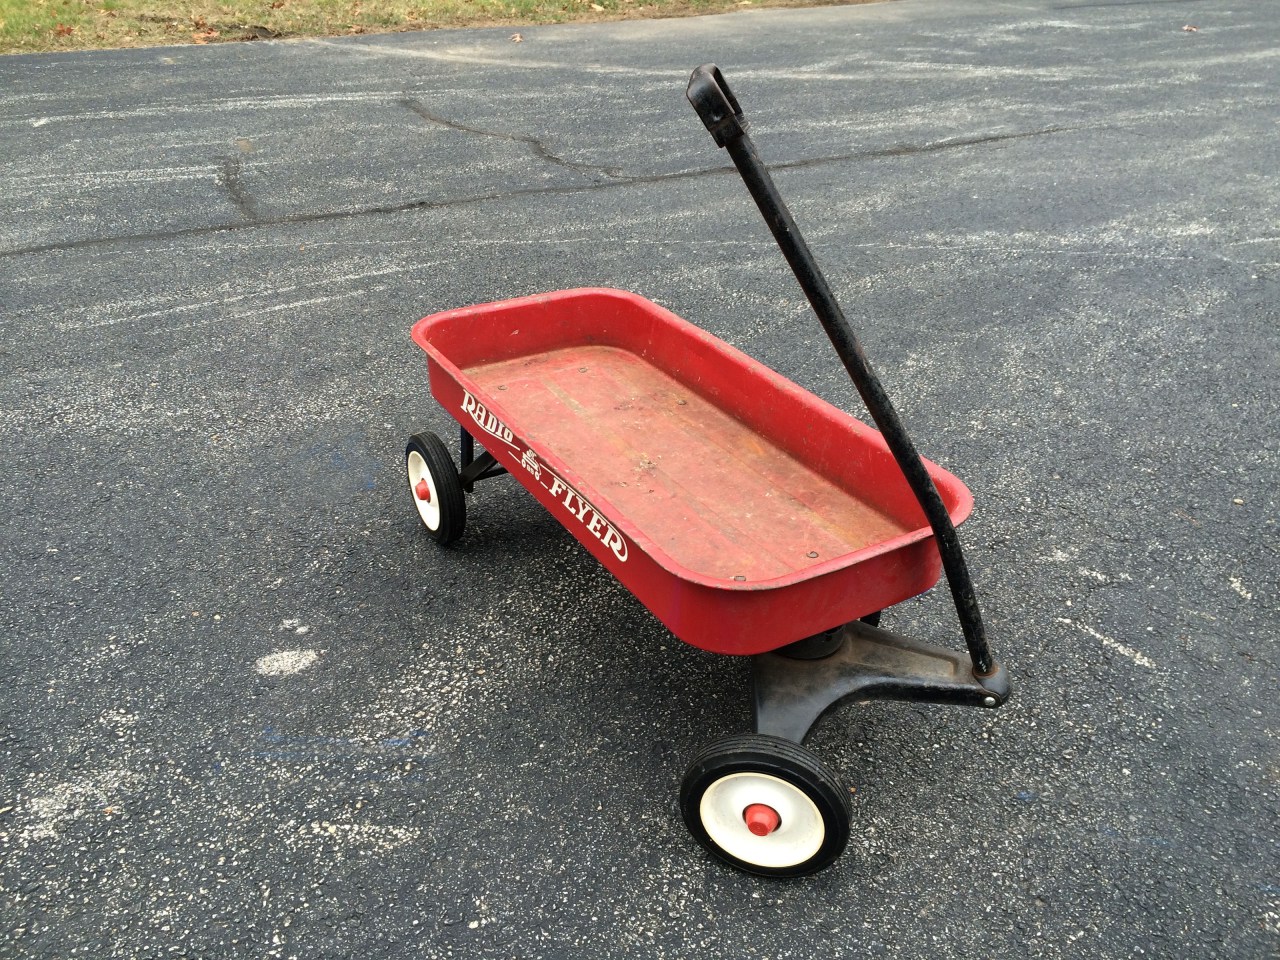
Photograph as many objects as possible that represent things you have lost, both tangible or intangible, trivial or profound.
Be sure wherever, possible, to keep the objects contained within the frame of the image. Take plenty of images of each object, to assure quality, including exposure, focus, framing etc. Choose a single image (best quality) for each “lost object.”
Lost Things
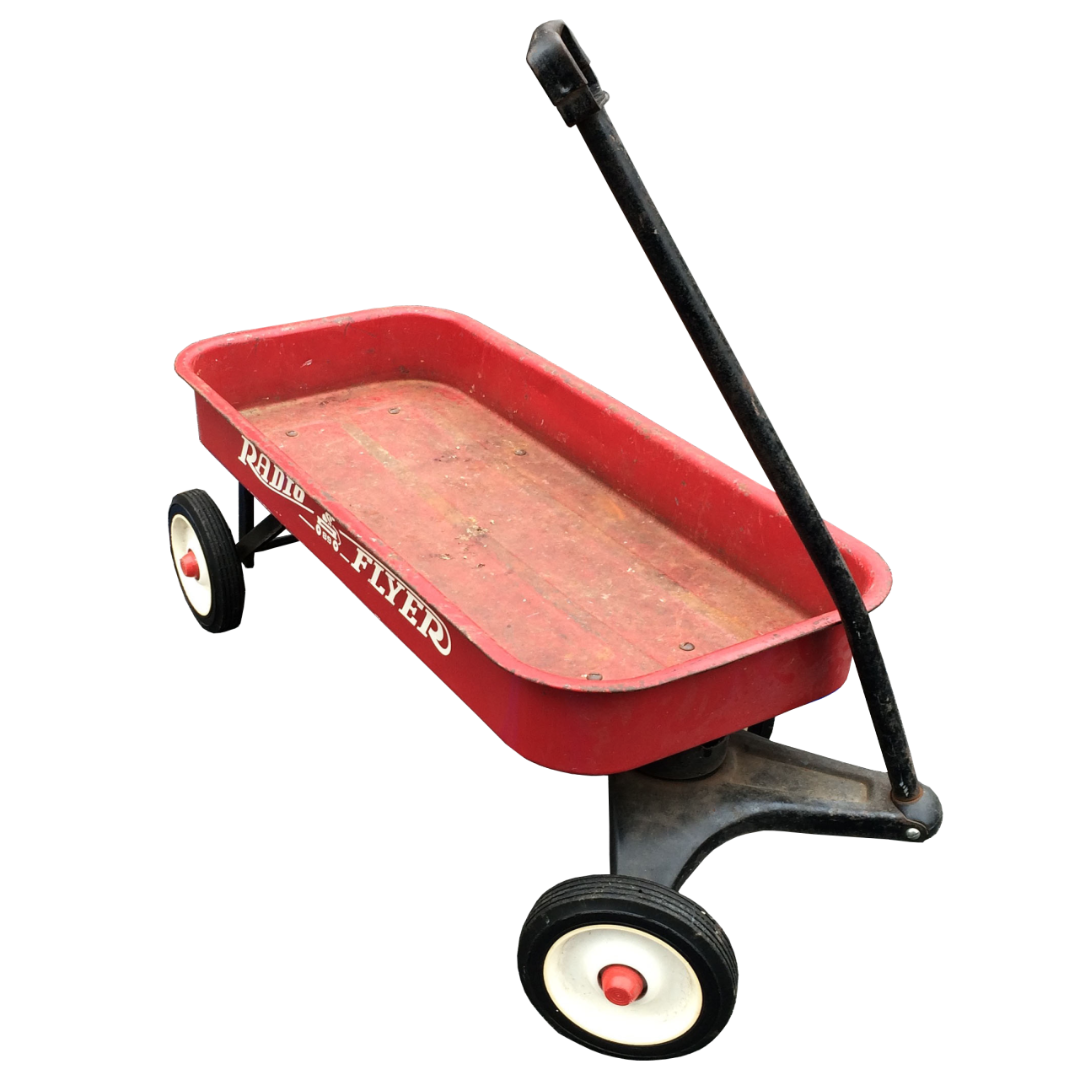
Choose the best, most meaningful images and use an image processing application, such as Adobe Photoshop, to isolate the objects on a transparent background, scale the image to 1024×1024 pixels, and save the images as .PNG files.
Write a short story, no more that a few paragraphs, of each “lost thing.” Bring the images and stories to our next meeting. Be prepared to tell the stories to the group and relate the stories to the objects you have chosen.
Project Production
Layar
Install the free Layar App augmented reality browser on your tablet or phone
*Advanced participants:
Create an Account
Log in > Layar > Menu > Setting > Account
Username: Your_Layar_Account_Username
Password: Your_Layar_Password
Select GeoLayar > Test
If necessary, test from remote location using Fixed Location
Layar > Setting > Developer optionsUse fixed location: √
Latitude: Your_POI_Latitude
Longitude: Your_POI_Longitude
Prepare your own PNG file with transparency
Save it at 1024×1024 pixel Lastname_Firstname.png
Save it at 128×128 pixel as Lastname_Firstname_Icon_128.png
Modify OBJ Convert an .obj file to the Layar proprietary .l3d file format using the Layar3D Model Converter Inspect Workshop_Assets/OBJs All three .obj, .mtl (UV map) and image file (.jpg or .png) are required Layar3D Model Converter Menubar > File > Import Wavefront (.obj/.mtl) = Workshop_Assets/OBJs/ Simple_Facing_Plane.obj Overview: Inspect stats, File size (bytes) not to exceed ~5,000,000Materials: Select > Replace Image = Your_2D_Object_1024.pngDiffuse = WhiteAmbient = WhitePreview: Menubar > File > Save As Your_Simple_Facing_Plane.l3d
Animated Assets Layar3D Model Converter – Menubar > Open = Workshop_Assets/Simple_Facing_Plane.l3d Materials: Diffuse = WhiteAmbient = Whitestatic – animation > Replace image = Workshop_Assets/Resources/Animation/Animation_512_01.png to Animation_512_10.pngAddDelay (ms) = 200Preview: Menubar > Enable > Animation Overview: Inspect stats, File size (bytes) not to exceed 1,000,000
Modify OBJ
Convert an .obj file to the Layar proprietary .l3d file format using the Layar3D Model Converter
Inspect Workshop_Assets/OBJs
All three .obj, .mtl (UV map) and image file (.jpg or .png) are required
Layar3D Model Converter
Menubar > File > Import Wavefront (.obj/.mtl) = Workshop_Assets/OBJs/ Simple_Facing_Plane.obj
Overview: Inspect stats, File size (bytes) not to exceed ~3,000,000
Materials: Select > Replace Image = Your_2D_Object_1024.png
Diffuse = WhiteAmbient = White
Preview: Menubar > File > Save As Your_Simple_Facing_Plane.l3d
Animated Assets
Layar3D Model Converter – Menubar > Open = Workshop_Assets/Simple_Facing_Plane.l3d
Materials: Diffuse = WhiteAmbient = Whitestatic – animation >
Replace image = Workshop_Assets/Resources/Animation/Animation_512_01.png to Animation_512_10.png
AddDelay (ms) = 200Preview:
Menubar > Enable > Animation
Overview: Inspect stats, File size (bytes) not to exceed 3,000,000
3D Assets
Photogrammetry
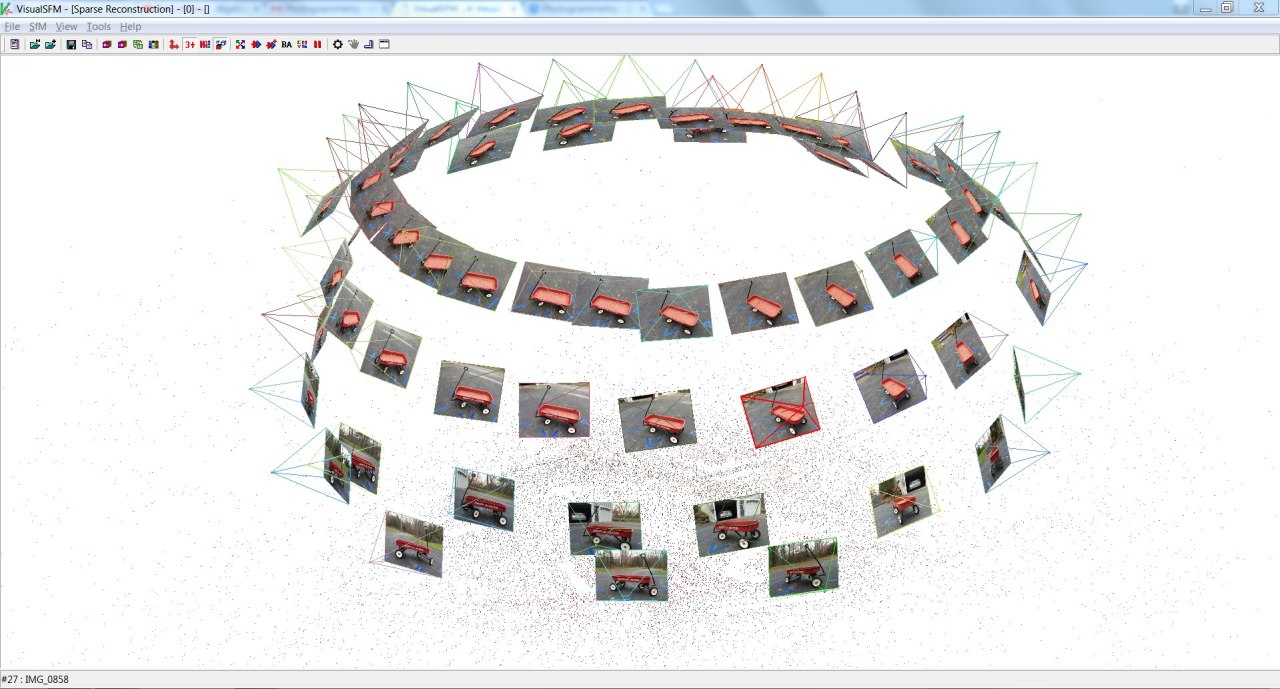
Photogrammetry is the science, technology and art of obtaining reliable information from non-contact imaging and other sensor systems about the Earth and its environment, and other physical objects and processes through recording, measuring, analyzing and representation. In this case, photogrammetry is used to create 3D models from series of photographs taken at various angles.
Photographic Input
Autodesk 123D Catch can be used for basic geometry extraction from a mobile device
Autodesk Memento Autodesk Memento is the easiest solution for desktop geometry extraction VisualSfM
A powerful opensorce core photogremmtry sollution is VisualSfM. Use it to perform point cloud dense reconstruction
From VisualSfM Menu > File > Open+ Multiple Images
Menu > SfM > Pairwise Matching > Compute Missing Matches
Menu > SfM > Construct Sparse (Compute 3D Reconstruction)
Menu > SfM > Reconstruct Dense (Run Dense Reconstruction)
Select work space for MVS = File_Name_Dense_Reconstuction
Import data to MeshLab to convert point cloud to poly mesh
See Mister P. MeshLab Tutorials
From MeshLab Menu > File > Import Mesh = Dense_Reconstuction.ply
Select and remove points that are not part of the object of interest
Menu > Filter > Sampling > Mesh Element Subsampling = ~50%
Menu > Filter > Remeshing, simplification and reconstruction > Surface Reconstruction: Poisson:
• Octree Depth = ~11,
• Solver Divide = ~10
Menu > File > Save Project As:
• Poisson mesh = File_Name_Poisson_Mesh.obj
• Project = File_Name. mlp
Menu > Filter > Selection > Select Faces with edges longer than
• Edge Threshold = TBD
Delete selected faces
Menu > Filter > Remeshing, simplification and reconstruction > Quadratic Edge Collapse
• Decimation = ~20,000
Menu > File > Export Mesh = File_Name_Poisson_Mesh.obj
From Autodesk Maya Menu > Import = File_Name_Poisson_Mesh.obj
Modeling Menu > UV > Automatic
Menu > Export = File_Name.obj
From MeshLab Menu > Import Mesh = File_Name.obj
Menu > Filter > Texturing
• Transfer Vertex Attribute to Texture (between two meshes)
• Source Mesh = Dense_Reconstruction
• Target Mesh = File_Name.obj
Menu > File > Export Mesh = File_Name.obj
From Maya Menu > Import = File_Name.obj (with File_Name.mtl and File_Name_color.png
Hypershade > Create New Lambert
Map a File Node to the Color attribute
Assign File_Name_color.png
Assign Lambert Material to Mesh
View Menu > Shading > Hardware Texturing
Rotate X = 180
Menu > Export = File_Name.obj
See Modify OBJ above to continue to AR
Build a Database
Domain Create a folder on you hard drive named Augmented_Reality
Download the Workshop Assets to your Augmented_Reality folder
Open Workshop_Assets/AR_Admin.rtf
Create an Account
GoDaddy Web Hosting > GET STARTED ECONOMY > ADD TO CART
Create a domain name: your_name.com (or .net etc.)
Document Your Work
Open the Workshop_Assets/AR_Admin.rtf file
In Text Edit(or) Enter the following
Domain
• Name: Your_Domain.ext
• Username: Your_Account_Username
• Password: Your_Account_Password
• PIN: Your_Account_PIN
User Manage My Domains
Manage Hosting WEB HOSTING > Manage
NEW C Panel > Set Up Enter the following in AR_Admin.rtf file
• Username: Your_User_Username
• Password: Your_User_Password
Database
From cPanel > MySQL @ Database Wizard
Add New User Add user to database
• √ ALL PRIVILEGES WEB HOSTING
Manage
MANAGE cPannel > phpMyAdmin
Enter the following in AR_Admin.rtf file
Database: Your_Database_Name
Username: Your_Database_Username
Password: Your_Database_Password
Project PHP
From Workshop_Assets/FTP_to_Your_Web_Server
Rename FTP_to_Your_Web_Server to Your_Project_Name
Credentials
Open Workshop_Assets/FTP_to_Your_Web_Server/Layar/config.inc.php
In a software development environment or a text editor
Edit the credentials and save the file
• define(‘DBHOST’, ‘localhost’);
• define(‘DBDATA’, ‘database_name‘);
• define(‘DBUSER’, ‘database_username‘);
• define(‘DBPASS’, ‘database_password‘);
Enter the following in AR_Admin.rtf file
• define(‘DBHOST’, ‘localhost’);
• define(‘DBDATA’, ‘database_name‘);
• define(‘DBUSER’, ‘database_username‘);
• define(‘DBPASS’, ‘database_password‘);
Configure Web
Service Right-Click the Your_Project_Name directory > Compress Your_Project_Name
In File Manager Upload the Your_Project_Name.zip to public_html
Right click Your_Project_Name.zip in File Manager and choose > Extract
Delete Your_Project_Name.zip
Enter Your_Domain.com/Your_Project/Layar/Your_Project_Title.php
In a web browser You should get the following message: Message: layer Name parameter is not passed in GetPOI request. Fatal error: Call to a member function prepare() on a non-object in /Your_Domain.com/Your_Project/Layar/Your_Project_Title.php on line 200
This is expected and the desired result
Enter the following in AR_Admin.rtf file
• API URL: Your_API Endpoint URL (See Create and Configure a GeoLayar below)
Add Tables to Database
cPanel > phpMyAdmin
Open Workshop_Assets/Layar_Tables_sqlQuery.sql in text editor
(Right-Click > Open > Trust)
Select > All
Edit > Copy
In phpMyAdmin select your_database_name
Select SQL Tab
Edit > Paste > Go
Modify Table Fields Icon
Icon:
In cPannel File Manager upload *Workshop_Icon_64.png to Your_Domain.com/Your_Project/Assets/
In phpMyAdmin
Your_Database Icon Table > Sidebar > Icon > Edit (pencil)
• id = 1
• url = a href=”Your_Domain.com/Your_Project/Assets/*Workshop_Icon_64.png”
• type = 1
Go
*Replace this image with your own PNG file
Layer:
See Create and Configure a GeoLayar
Layar Table > Browse Tab > Edit (pencil)
• layer = yourlayarname (Established in Create and Configure a GeoLayar)
• refreshInterval = 300refresh
• Distance = 100full
• Refresh = 1show
• Message = √
• id = 1biwStyle = classic
Go
LayarAction:
LayarAction Table > Browse Tab > Edit (pencil)
No change
Object:
In Photoshop Modify Simple_Facing_Plane_512.png from Workshop_Assets/ResourcesSave as Your_Project_512px.png
In cPannel File Manager
Upload Your_Project_512px.png Your_Domain.com/Your_Project/Assets/
In phpMyAdmin Browse Tab > id1 > Edit (pencil)
• id = 1contentType = image/vnd.layar.generic
• url = Your_Domain.com/Your_Project/Assets/Your_Project_512px.png
• reducedURL = √size = 100.00000
Go
In cPannel File Manager Upload *Simple_Facing_Plane.l3d Your_Domain.com/Your_Project/Assets/
In phpMyAdmin Browse Tab > id2 > Edit (pencil)
• id = 2contentType = model/vnd.layar.l3d
• url = Your_Domain.com/Your_Project/Assets/Simple_Facing_Plane.l3d
• reducedURL = √
• size = 100.00000
Go
* We will replace this model with your modification of the Simple_Facing_Plane.l3d file, see Project Production
POI:
In Photoshop Modify Simple_Facing_Icon_128.png from Workshop_Assets
Save as Your_Project_Icon_128.png
In cPannel File Manager Upload Your_Project_Icon_128.png Your_Domain.com/Your_Project/Assets/
In Google Maps Find Location (latitude, longitude)
Right-Click on location and choose ‘What’s here?’ to determine GPS coordinates
In phpMyAdmin POI Table > Insert Tab
• id = Your_Object
• footnote = Your Name
• title = Your_Project_Title
• lat = Your Location latitude
• lon =Your Location longitude
• imageURL = your_domain.com/yourprojectname/Assets/Your_Project_Icon_128.png
• description = Short description (3 or 4 words max)
• biwStyle = classicalt = √
• doNotIndex = 0show
• SmallBiw = 0show
• BiwOnClick = 1poi
• Type = geo
• iconID = 1object
• ID = 2
• transformID = 1
• layerID = 1
Go
Transform:
Transform Table > Browse Tab > Edit (pencil)
• id = 1
• rel = 1 (always face user)
• angle = 0
• rotate_x = 0
• rotate_y = 0
• rotate_z = 1
• translate_x = 0
• translate_y = 0
• translate_z = 1.5
• scale = 2.0
Go
Transform Table > Browse Tab > Edit (pencil)
• id = 2
• rel = 1 (always face user)
• angle = 0
• rotate_x = 0
• rotate_y = 0
• rotate_z = 1
• translate_x = 0
• translate_y = 0
• translate_z = 0.0
• scale = 1
Go
Create and Configure a GeoLayar
Set Up a Layar Developer Account
Review Steps to create a layer
Create an Account
Become a Layar Developer
Login to Layar Developer Section
Create a Layar
In Layar Developer Section click ‘Create a new layer!’
• Title = Your Project Title (20 characters max with spaces)
• √ Geo Layer
CREATE LAYER
OVERVIEW:
Icon = *Workshop_Assets/Resources/Workshop_Icon_128.png
* Replace this image with your own .PNG file, maintain pixel dimentions and naming conventions, such as Your_Project_Title_Icon_128.png
In Layar section of Workshop_Assets/AR_Admin.rtf, update
• Layer Title
• Layer Name
SAVE OVERVIEW
API:
Replace API URL with API URL from Layar section of Workshop_Assets/AR_Admin.rtf (established in Build a Database)
SAVE API
METADATA:
• CATAGORY = Art
• TAGS = your name, project name, exhibition title, location
• PUBLISHER = Your Name
• Short description (60 characters max)
• Long description
SAVE METADATA
GRAPICS:
ICON = *Workshop_Assets/Resources/Icon_120.png
* Replace this image with your own .PNG files, maintain pixel dimentions and naming conventions, such as Icon_120.png
Design BIW look and feel
SAVE GRAPHICS
Test Layar:
For details see: Test a layer Layar Developer Section
My layars > yourlayarname Test
• Enter geolocation:
• Save location = Your_Location
• Load POIs
Install Layar to Mobile Device
Install the free Layar Augmented Reality Browser on your tablet or phone and login Layar > Menu > Setting > Account
• Username: Your_Layar_Account_Username
• Password: Your_Layar_Password
Ignore Scan (See Layar Vision for more on Layar Vision)
Select GeoLayar >
Test If necessary, test from remote location using Fixed Location Layar > Setting > OptionsUse fixed location: √
• Latitude: Your_POI_Latitude
• Longitude: Your_POI_Longitude