!!!! Lets Learn PIXLR !!!! (Basic Tools)
by rohit44524 in Living > Education
126915 Views, 22 Favorites, 0 Comments
!!!! Lets Learn PIXLR !!!! (Basic Tools)

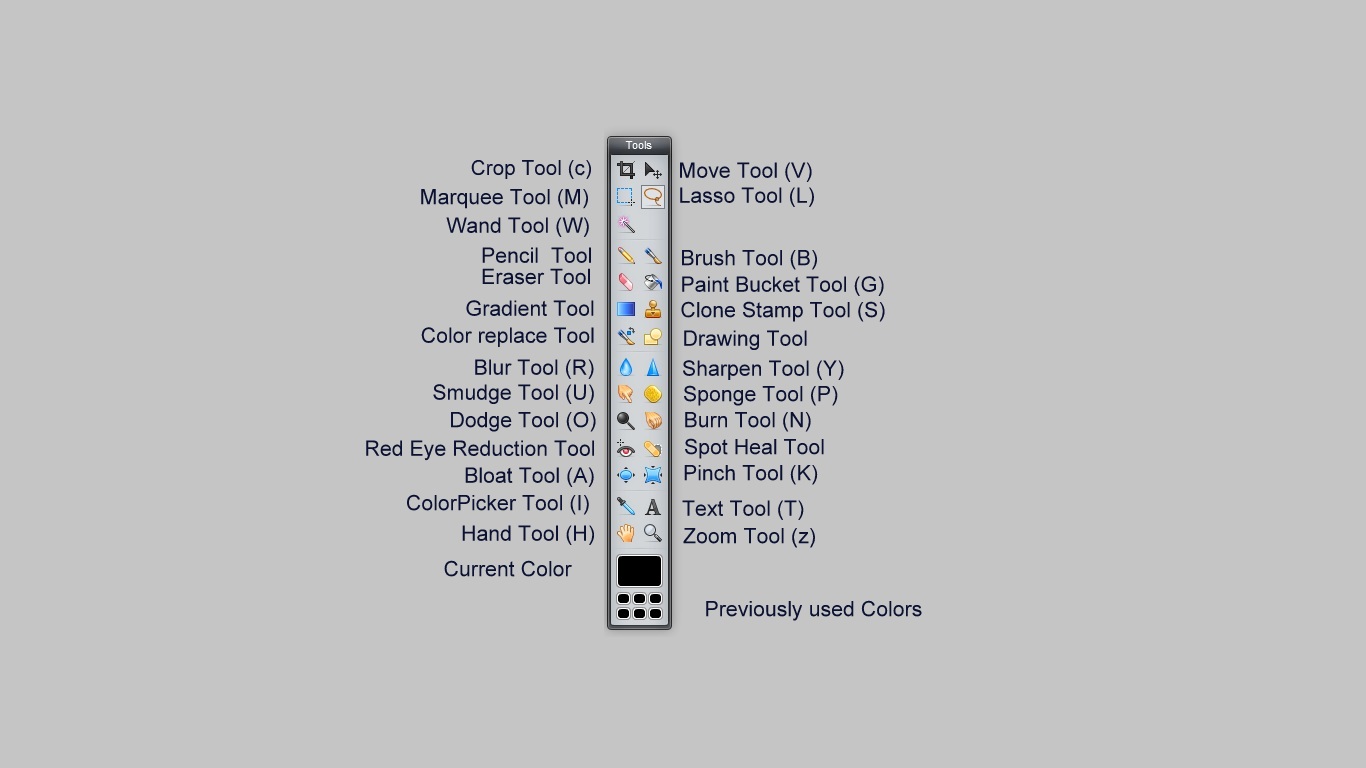
I have seen many of you wanna learn PIXLR , very impressive tool for photo editing ...
when i seen it first my reaction was WAOOWW !!! its like online photoshop ,, no need to install photoshop of 500-700 MB
So guys Who know photoshop will not have any problem using PIXLR, but those who dont even know photoshop for them , i will demonstrate all the Basic tools for having some start on PIXLR.
Basic Tools Are :
#Selection tools
Marquee tool – Click the button, then click and drag your screen to select a square or rectangular area.
Move tool – Click the button, then click and drag your screen to move your layer, selection, etc.
Lasso tool – Click the button, then click and drag your screen to make selections freehand. To complete the selection, close the loop by dragging all the way back to your starting point.
Crop – Click the button, then click and drag your screen to crop down to whatever you have selected.
Wand – Click the button, then click your screen to select swaths of color that match the color you clicked on. Check Contiguous to only select pixels that touch; uncheck Contiguous to select matching pixels anywhere in the image. Raise or lower your Tolerance to make the color parameters more or less strict.
#Editing tools.
Pencil tool – Click the button, then click and drag your image to draw freehand.
Eraser tool – Click the button, then click and drag your image to erase that area.
Brush tool – Click the button, then click and drag your image to draw freehand.
Paint Bucket tool – Click the button, then click your image to apply a solid color to that area.
Clone Stamp tool – Click the button, then hold down SHIFT and click an area of the image that you’d like to clone. Release SHIFT, then move the cursor over the area where you want the cloned image to be and click and drag; the area around your source will then appear wherever you click and drag. This is a very useful tool for covering imperfections (ex. cloning a smooth area of skin over a blemished area).
Gradient tool – Click the button, then click and drag your image to apply a color gradient to that portion of the image. The color(s) of the gradient come from the two color patches in your Tools panel (usually white and black as the defaults). Change the color patches to change the color(s) used in the gradient. You can also modify the type of gradient by changing the options at the top of the screen.
#Blending tools
Blur tool – Click the button, then click your image to blur that area.
Sharpen tool – Click the button, then click your image to sharpen that area.
Smudge tool – Click the button, then click your image to smudge that area. This is useful for softening wrinkles.
Sponge tool – Click the button, then click your image to saturate or desaturate (i.e. intensify or reduce) the colors in that area.
Dodge tool – Click the button, then click your image to lighten that area.
Burn tool – Click the button, then click your image to darken that area.
#Special filters and effects.
Red Eye tool – Click the button, then click on the red parts of the eye in the photo to correct those areas.
Drawing tool – Click the button, then click and drag to draw freehand shapes.
Bloat tool – Click the button, then click your image to fatten up that area. Useful for making lips poutier, eyes bigger, etc.
Pinch tool – Click the button, then click your image to shrink that area.
#Miscellaneous tools.
Color Picker tool – Click the button, then click a color you like in your image; that color will now be the mail color in you color patches. To select a picked color as the alternate (i.e. background) color in your color patches, hold SHIFT while clicking.
Text tool – Click the button, then click and drag your image to create a box into which you can type.
Hand tool – Click the button, then click and drag your image to scroll it around.
Magnifying tool – Click the button, then click your image to magnify.
Introduction to Interface
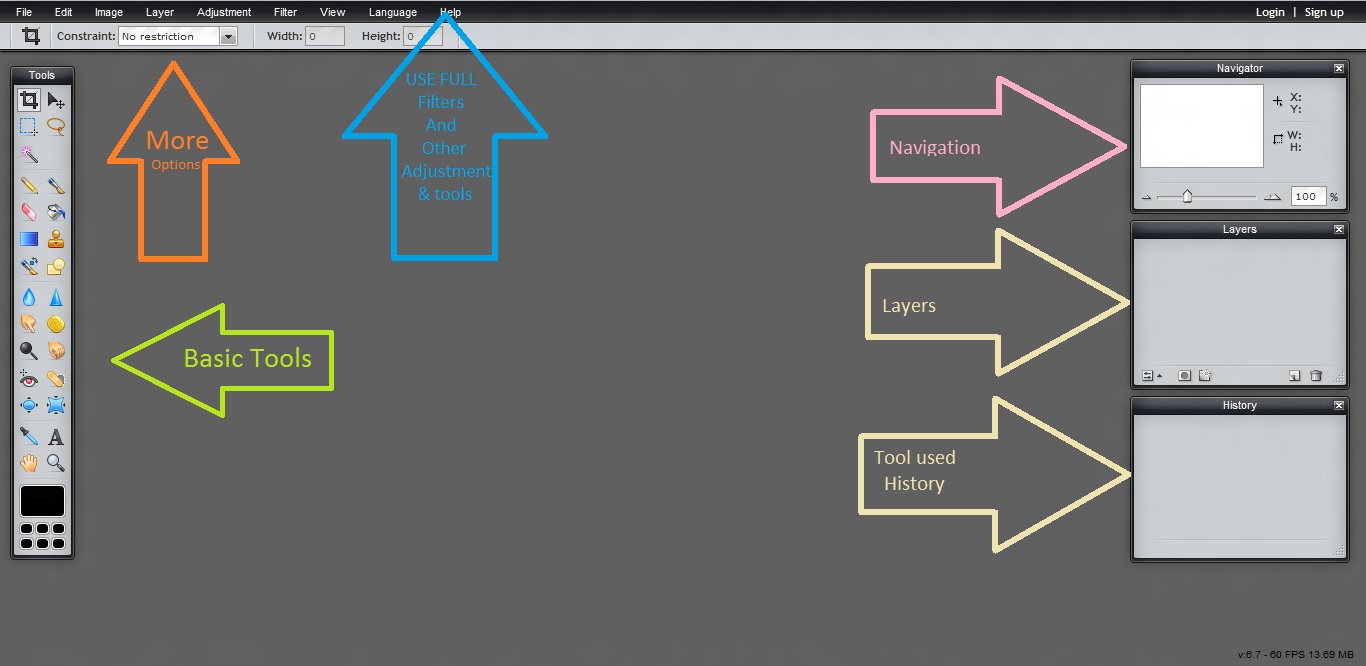
Look for the Navigator panel, which displays a miniature version of your image, in its default position at the upper right-hand area of the image screen. Use the Navigator panel to zoom in and out and find your way around the photo. Click on the sliding bar and slide it to the left to zoom out or the right to zoom in. You can also manually enter a zoom ratio (ex. 50%, 100%) in the percentage box. If you’re deeply zoomed into a photo and having trouble navigating, click the box inside the Navigator panel, which shows you where in the image you currently are, and drag it around until you’re where you want to be.
Look for the Layers panel in the middle of the right-hand side of the image screen. Use the Layers panel to make, select, edit, and rearrange layers of adjustments to your original image. Many of the changes you make to your photo (including adding text, apply filters, and pasting other images) will automatically appear as new, individual layers. In addition to keeping your original image as intact as possible, this also grants you a high degree of control over the changes you make by allowing you to modify only one thing at a time. Select a layer you want to work with and modify it by reducing the opacity from 100%, clicking the up and down arrows to move it over or under another layer, changing how it blends with the other layers by choosing another option from the drop-down list next to “Normal,” throwing it away by hitting the trash can button, etc. Make sure you’re working on the correct layer while editing your image or your changes may not have any effect / have an undesired effect.
Tip: If you painstakingly select a certain part of your image only to realize that you’re working on the wrong layer (i.e. one that doesn’t actually contain the pixels you’ve selected), simply click on the correct layer. The selection will not disappear.
Tip: To be able to modify your “Background” layer (i.e. the very first layer made – often your original image), which is locked by default (see the padlock image to the right of the layer name), double-click it and give it a new name. This will unlock it, allowing you to edit it directly.
Look for the History panel at the bottom right-hand side of the image screen. This shows you a list of all changes you’ve made to your image. To navigate these edits, simply click on the one you’re interested in. Although you can go back and forth freely between these edits, note that going back to a previous edit and then changing your image will erase all edits after that point, replacing them with new ones.
Look for the Tools panel on the left-hand side of the image screen. It contains buttosn for many of the editing tools you will be working with. If you aren’t sure where to begin, hold your cursor over a button for a few seconds and the name will appear. See below for more information on individual tools.
Tip: Whenever you select a tool, look at the options that appear at the top of the screen just beneath the toolbar. These options will allow you to modify things such as brush size, style, opacity percentage, blending mode, and many more.
Crop Tool
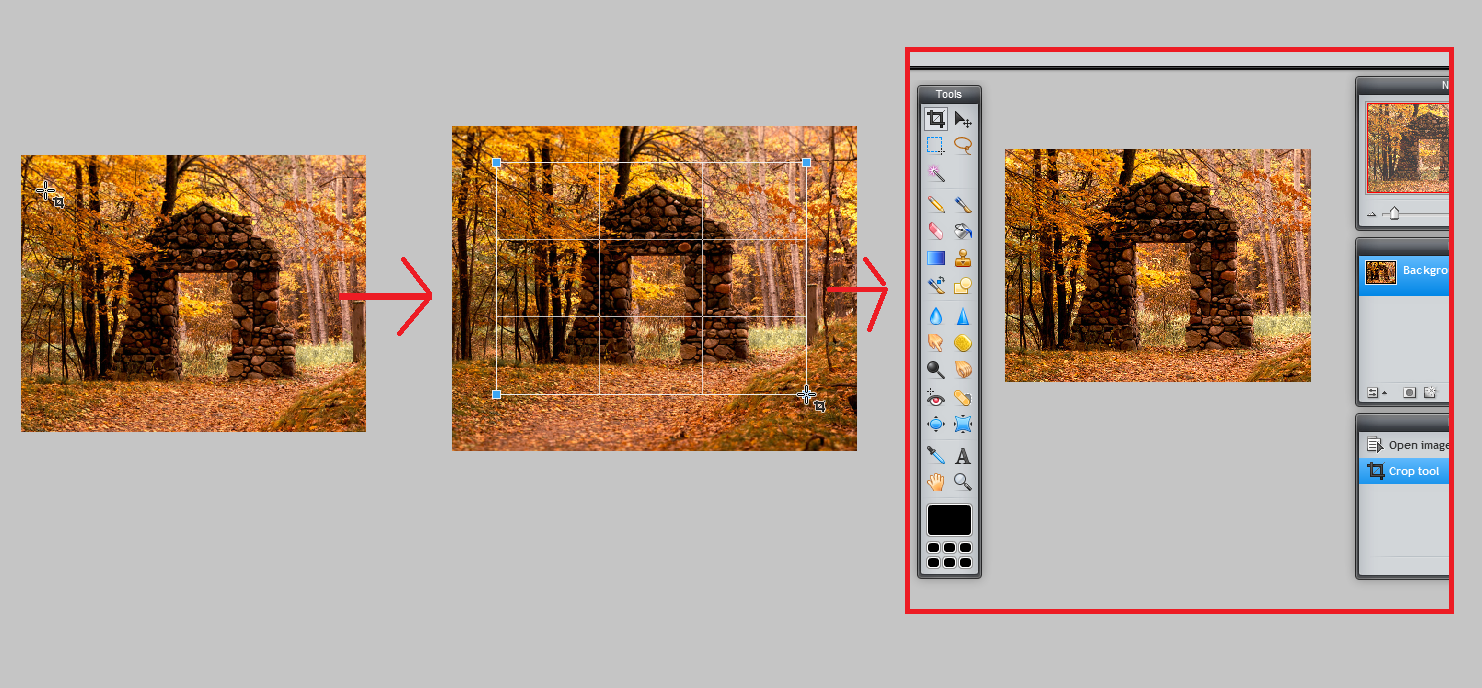
Crop – Click the button, then click and drag your screen to crop down to whatever you have selected. and rest will be deleted and result file will have the size you croped.
Move Tool
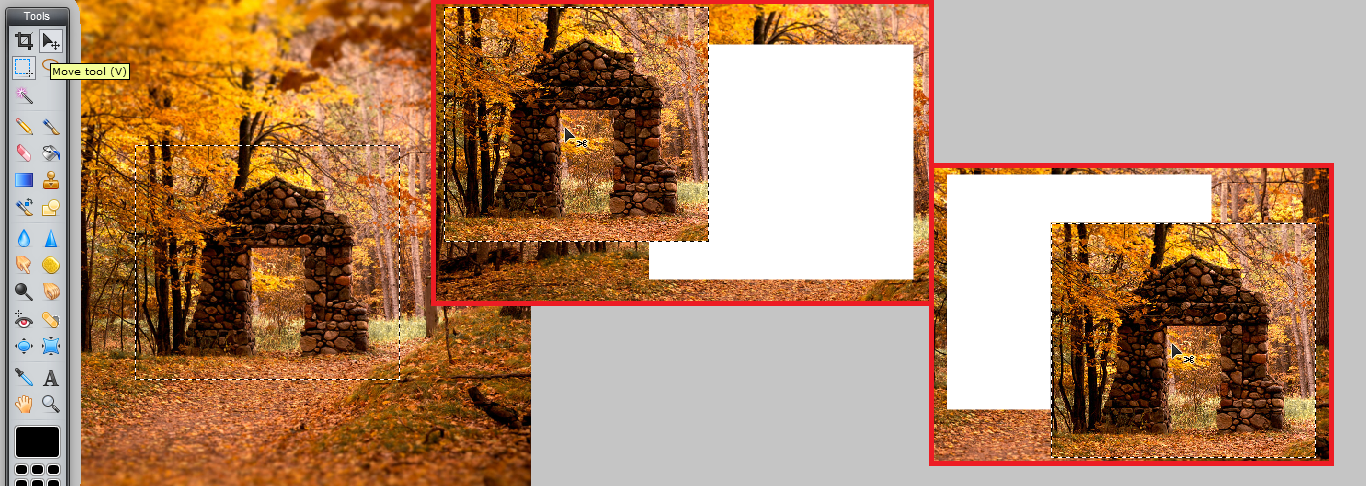
Move tool – Click the button, then click and drag your screen to move your layer, selection, etc.
this works with any kind of selection tool.
this works with any kind of selection tool.
Marquee Tool
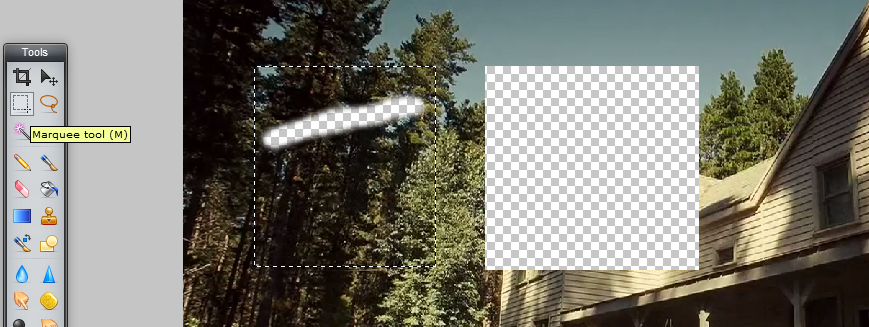
Marquee tool – Click the button, then click and drag your screen to select a square or rectangular area
from custom setting we can choose a oval shape for circular selection
from custom setting we can choose a oval shape for circular selection
Lasso Tool
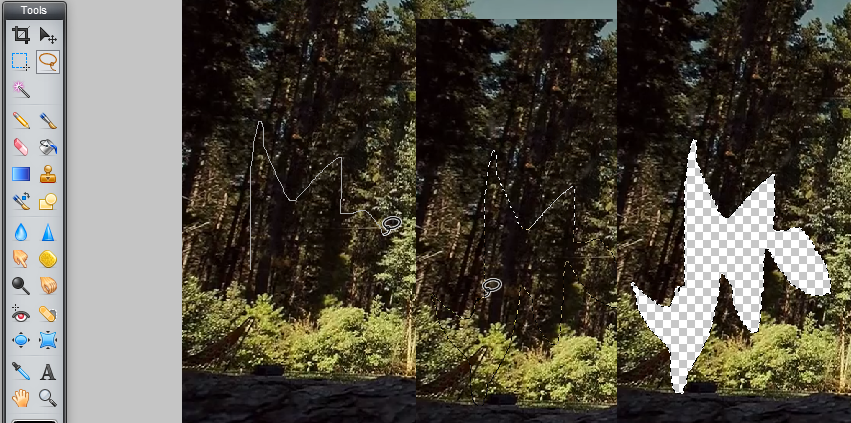
Lasso tool – Click the button, then click and drag your screen to make selections freehand. To complete the selection, close the loop by dragging all the way back to your starting point.
Wand Tool
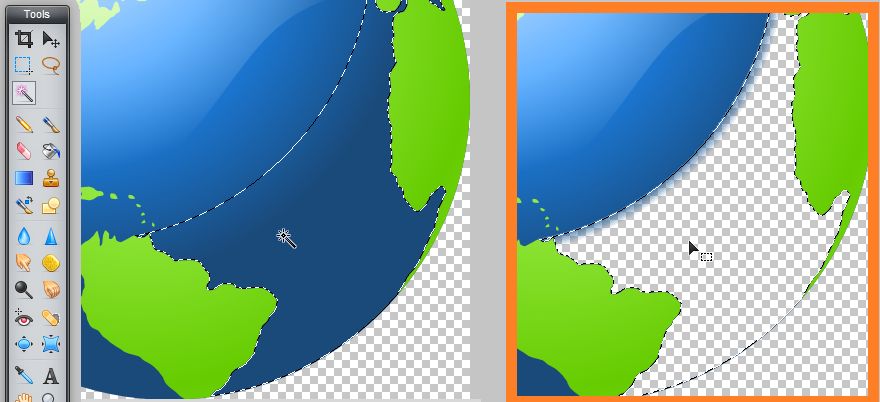
Wand – Click the button, then click your screen to select swaths of color that match the color you clicked on. Check Contiguous to only select pixels that touch; uncheck Contiguous to select matching pixels anywhere in the image. Raise or lower your Tolerance to make the color parameters more or less strict.
Pencil Tool
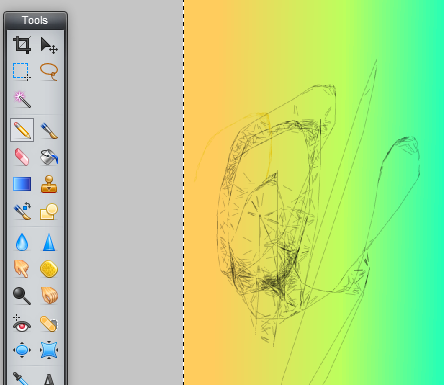
Pencil tool – Click the button, then click and drag your image to draw freehand.
Brush Tool
Brush tool – Click the button, then click and drag your image to draw freehand.
No pic for brush as its simple to use ,, u need to know here that you can change size from top left corner
No pic for brush as its simple to use ,, u need to know here that you can change size from top left corner
Eraser Tool
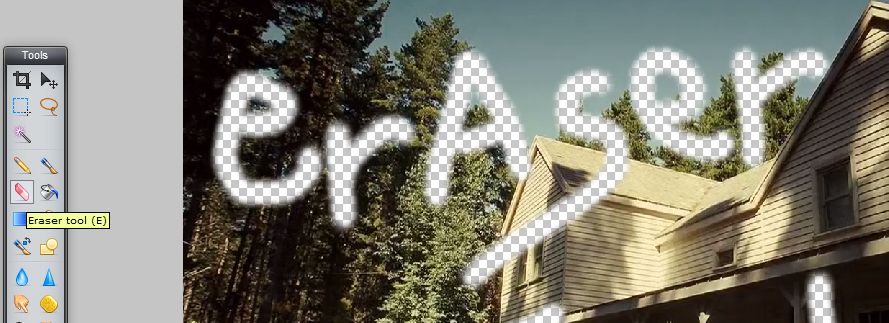
Eraser tool – Click the button, then click and drag your image to erase that area.
Paint Bucket Tool
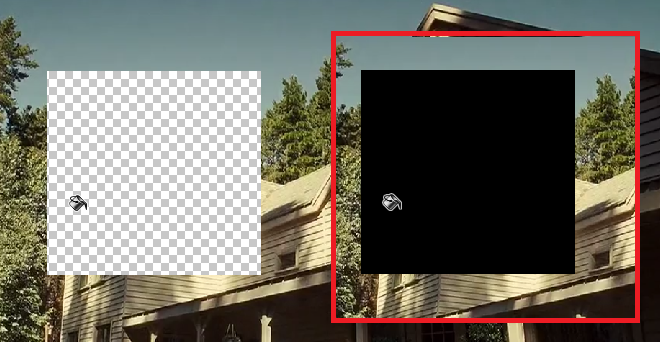
Paint Bucket tool – Click the button, then click your image to apply a solid color to that area.
Gradient Tool
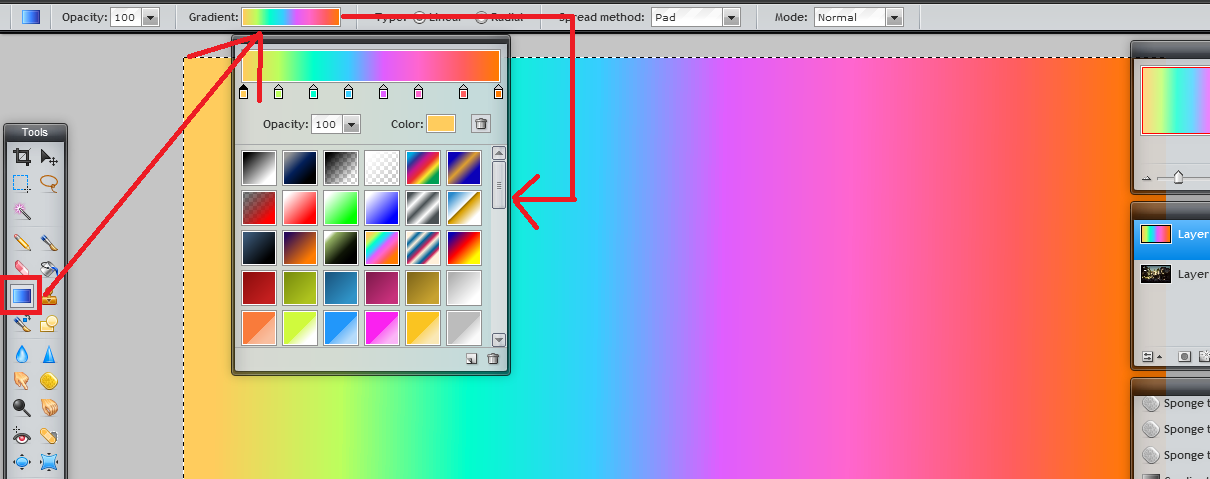
Gradient tool – Click the button, then click and drag your image to apply a color gradient to that portion of the image. The color(s) of the gradient come from the two color patches in your Tools panel (usually white and black as the defaults). Change the color patches to change the color(s) used in the gradient. You can also modify the type of gradient by changing the options at the top of the screen.
Clone Stamp Tool

Clone Stamp tool – Click the button, then hold down SHIFT and click an area of the image that you’d like to clone. Release SHIFT, then move the cursor over the area where you want the cloned image to be and click and drag; the area around your source will then appear wherever you click and drag. This is a very useful tool for covering imperfections (ex. cloning a smooth area of skin over a blemished area).
Color Changer Tool


Color Changer tool - the tool use the center of the brush as a reference for the replace color (i.e the entire brush don't have to cover the color).
Blur Tool
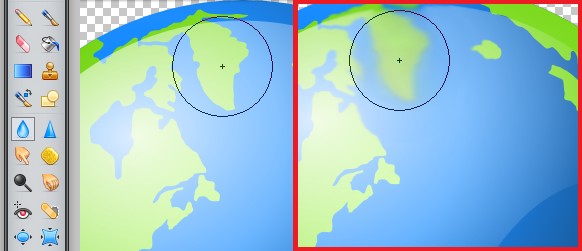
Blur tool – Click the button, then click your image to blur that area.
Sharpen Tool
Sharpen tool – Click the button, then click your image to sharpen that area. Not much efficient tool to demonstrate
Smudge Tool

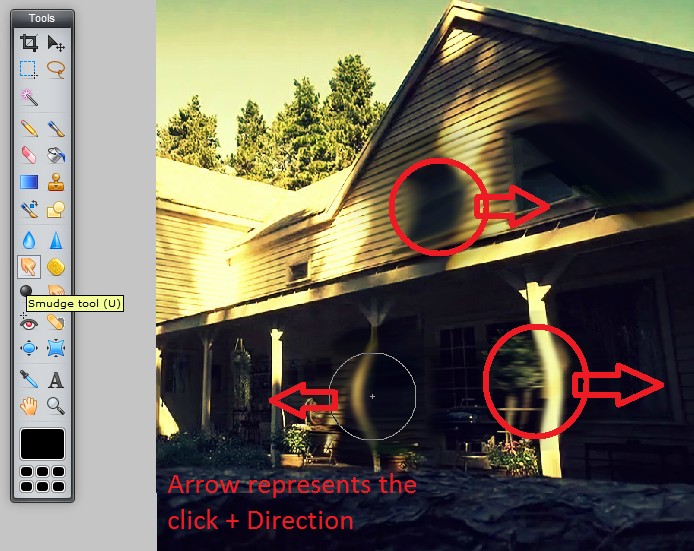
Smudge tool – Click the button, then click your image to smudge that area. This is useful for softening wrinkles.
Sponge Tool

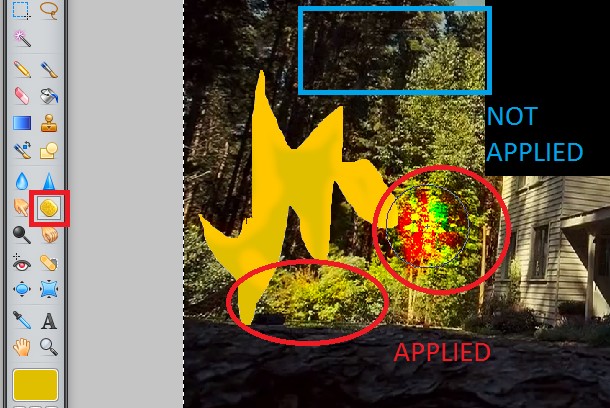
Sponge tool – Click the button, then click your image to saturate or desaturate (i.e. intensify or reduce) the colors in that area.
Dodge Tool

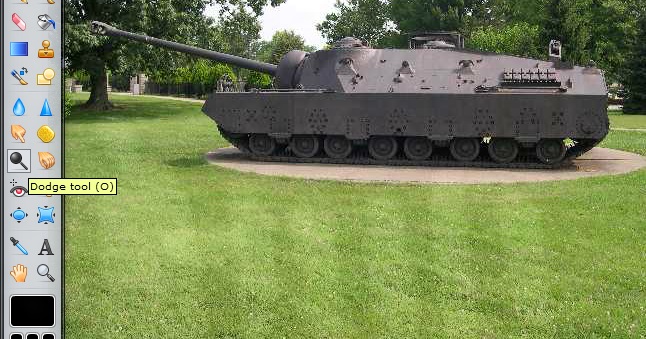
Dodge tool – Click the button, then click your image to lighten that area.
Burn Tool

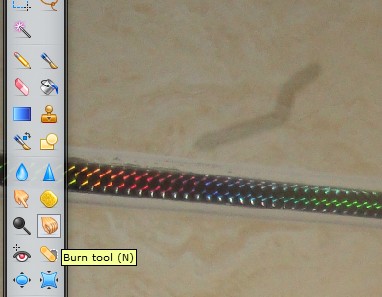
Burn tool – Click the button, then click your image to darken that area.
Clone Stamp Tool

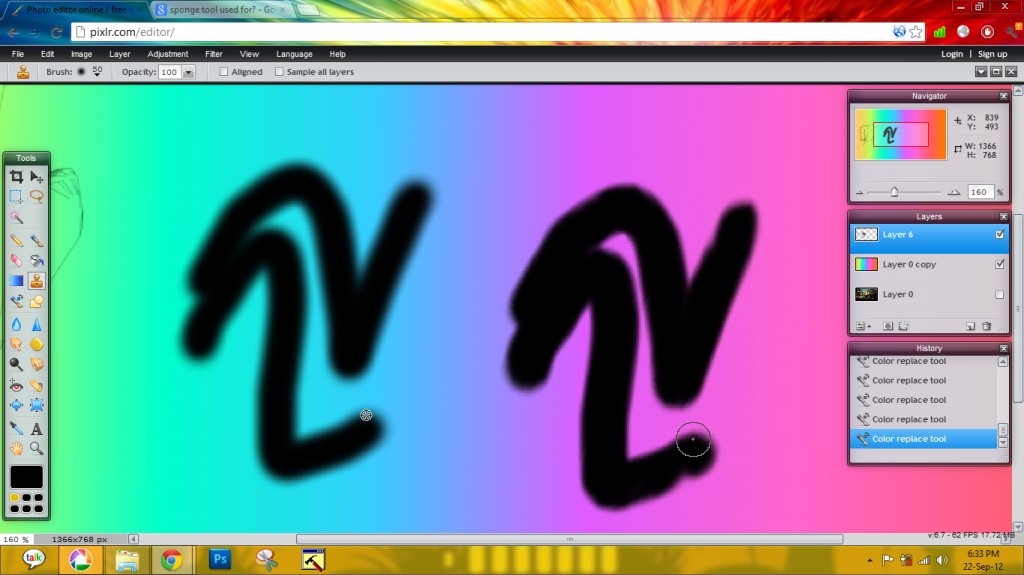
Clone Stamp Tool - it allows you to duplicate part of an image. press CTRL + CLICK from where you want to copy or duplicate and then use as Brush
Bloat Tool

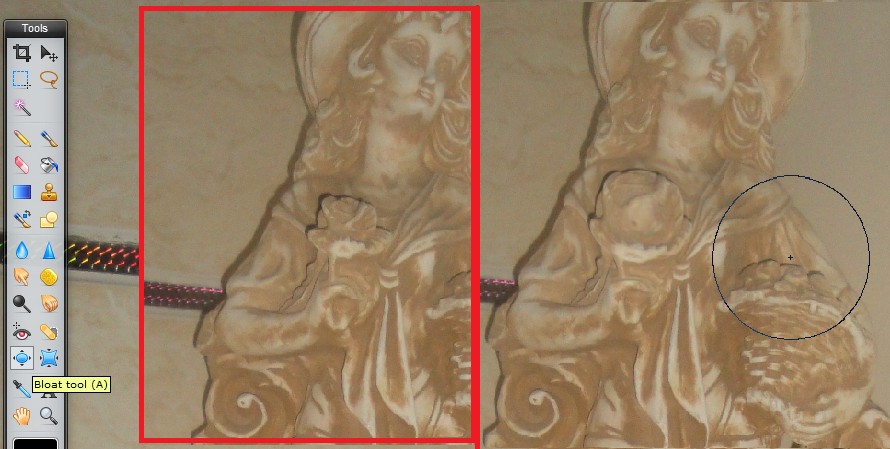
Bloat tool – Click the button, then click your image to fatten up that area. Useful for making lips poutier, eyes bigger, etc.
Pinch Tool

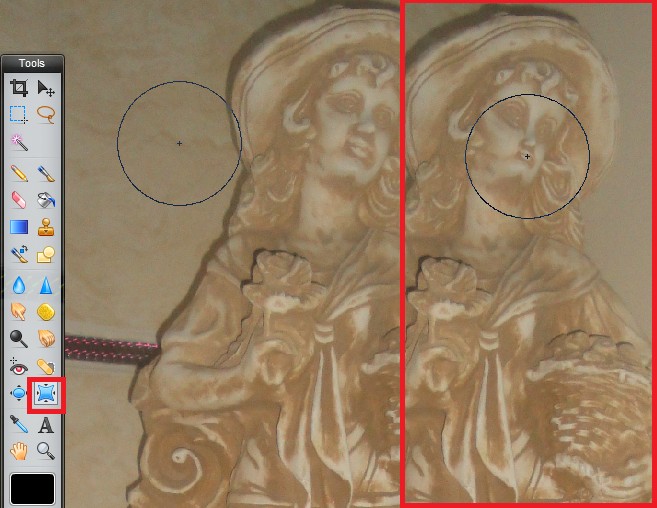
Pinch tool – Click the button, then click your image to shrink that area.
Color Picker Tool
.jpg)
Color Picker tool – Click the button, then click a color you like in your image; that color will now be the mail color in you color patches. To select a picked color as the alternate (i.e. background) color in your color patches, hold SHIFT while clicking
Text Tool

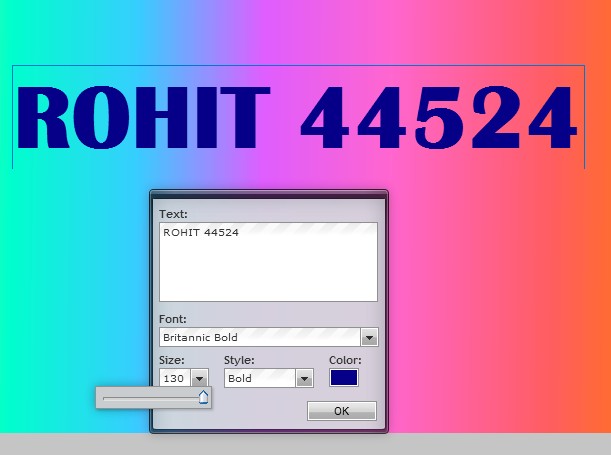
Text tool – Click the button, then click and drag your image to create a box into which you can type.
Hand Tool

Hand tool – Click the button, then click and drag your image to scroll it around
it works when zoomed in and u wanna go to some other part of picture
it works when zoomed in and u wanna go to some other part of picture
Magnifying Tool
Magnifying tool – Click the button, then click your image to magnify
Simply just click to zoom
right click to zoom out
Simply just click to zoom
right click to zoom out
Color Chooser

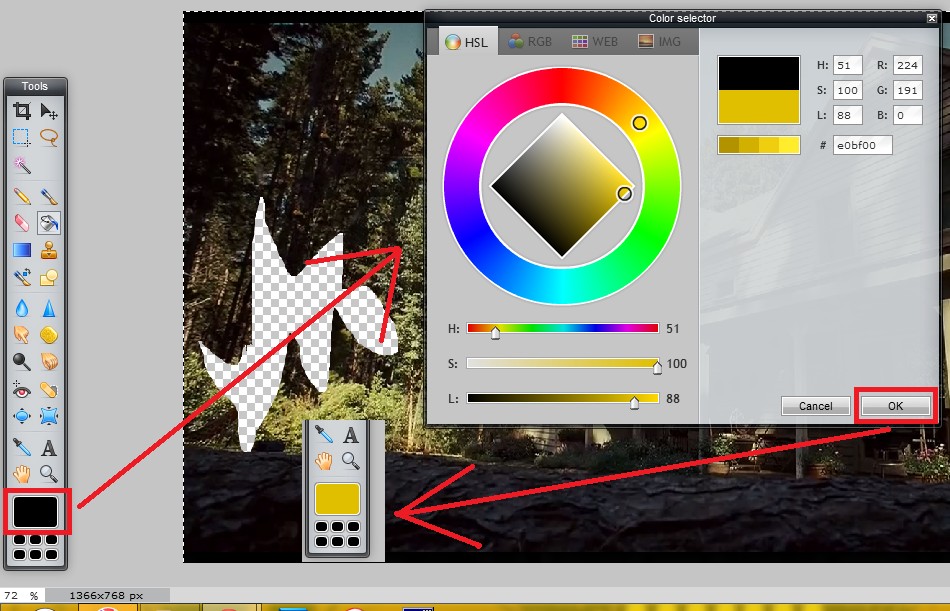
Color chooser is not a tool but a utility that lets us to choose different colors
and also shows the recent color choosed.
and also shows the recent color choosed.